Send email to multiple recipients in one go with Dataverse connector using Power Automate
In today's fast-paced digital world, effective communication
is paramount. Whether you're coordinating with team members, reaching out to
clients, or disseminating important information, sending emails efficiently can
save you time and streamline your workflow. One powerful tool that can help you
achieve this is Power Automate, Microsoft's cloud-based service that allows you
to automate workflows across various applications and services.
In this blog
post, we'll delve into how you can leverage the Dataverse connector within
Power Automate to send emails to multiple recipients in one go, simplifying
your email communication process and boosting your productivity.
Fig.1
An activity
party in Power Apps is typically associated with various attributes that define
the role and identity of the participants. Here's a breakdown of key attributes
you might encounter:
Attributes
of Activity Party:
PartyId: This attribute stores the ID of the
party involved in the activity. It can be a user, contact, account, or any
other entity type.
ParticipationTypeMask: This attribute indicates the role
of the party in the activity. For example, it specifies whether the party is a
sender, recipient, required attendee, etc.
ActivityId: This attribute links the activity
party to the specific activity (e.g., an email, appointment).
Common
Participation Type Masks
These are
some of the common participation type masks you'll encounter:
1: Sender
2: Recipient
3: CC
Recipient
4: BCC
Recipient
5: Required
Attendee
6: Optional
Attendee
7: Organizer
8: Regarding
While using
Email Messages entity for sending email using power automate, it will ask for
the Activity party name and Activity party value.
It can be
either selected from dropdown or given as JSON schema.
Fig.2
To send
email to multiple recipients follow the steps below.
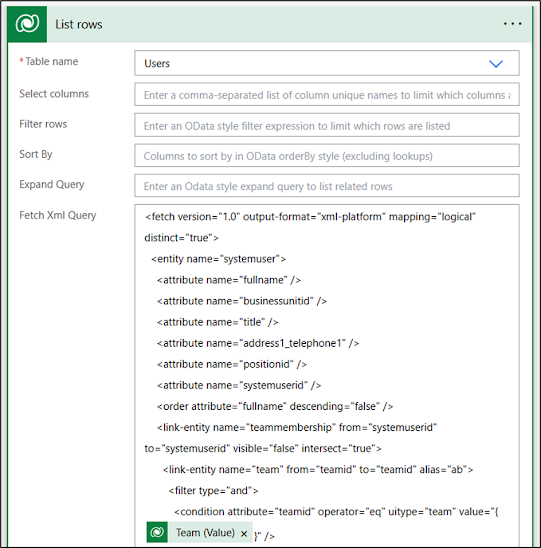
Step 1:
We are going
for the List Rows to get all the Users.
Fig.3
Once all the
Users are listed, we must pass the GUID of all users into an array so that the
array can used for sending email.
If multiple
recipients are there, we must go for the JSON schema method.
The syntax
of JSON schema is as follows:
{
"participationtypemask": 2,
"partyid@odata.bind":
"systemusers(<GUID>)"
}
Fig.4
Step 3:
Now the
variable holds the information of all the users to whom the email must be sent.
This array
variable can be used in the Email Messages Step
Fig.5
One the
trigger condition is met, the flow fetches all the users and passes the user
GUID to the array variable. And the email is sent to all users in a go.
Fig.6


Comments
Post a Comment